[∇] [@] MicroPython pour les microcontrôleurs
Version 2020-10-17
Licence cc-by-sa ModLibre.info sauf autres indications
NB : Copiez les instructions que vous voulez tester dans une version récente de MicroPython (ou de Python 3 dans certains cas)
[∇] [Δ] Plan de l’introduction à MicroPython pour les microprocesseurs
- BBC micro:bit : Affichage séquentiel
- BBC micro:bit : Affichage d’un canard
- BBC micro:bit : LED clignotante
- Pyboard : Tableaux inspirés de Mondrian
[∇] [Δ] BBC micro:bit : Affichage séquentiel
H e l l o W o r l d ! # Copyright (C) 2017-2018 cc-by-sa 4.0 License : SparkFun
# Version 2018-04-18 cc-by-sa 4.0 http://ModLibre.info
#
# SparkFun Electronics https://www.sparkfun.com/microbit
# https://learn.sparkfun.com/tutorials/sparkfun-inventors-kit-for-microbit-experiment-guide
# Experiment 0.0 : Display "Hello World!" on your micro:bit
#
# Circuit: None = Aucun (compatible with 4tronix Music:Box)
# 3 P0 4 5 6 7 P1 8 9 10 11 12 P2 13 14 15 16 17 3V 18 19 20 21 0V 22
# P0 P1 3V 0V
from microbit import *
while True:
display.scroll("Hello World!")
sleep(1000)Simulations de l’écran du micro:bit : un caractère à la fois !
H e l l o W o r l d ! [∇] [Δ] BBC micro:bit : Affichage d’un canard
  * *
* * *
  * * * * *
    * * *
# Copyright (C) 2017-2018 cc-by-sa 4.0 License : SparkFun
# Version 2018-04-18 cc-by-sa 4.0 http://ModLibre.info
#
# SparkFun Electronics https://www.sparkfun.com/microbit
# https://learn.sparkfun.com/tutorials/sparkfun-inventors-kit-for-microbit-experiment-guide
# Experiment 0.1 : Display an image
#
# Circuit: None = Aucun (compatible with 4tronix Music:Box)
# 3 P0 4 5 6 7 P1 8 9 10 11 12 P2 13 14 15 16 17 3V 18 19 20 21 0V 22
# P0 P1 3V 0V
from microbit import *
while True:
display.show(Image.DUCK)Simulations de l’écran du micro:bit
  * *
* * *
  * * * * *
    * * *
□ ■ ■ □ □
■ ■ ■ □ □
□ ■ ■ ■ ■
□ ■ ■ ■ □
[∇] [Δ] BBC micro:bit : LED clignotante
Simulation de la LED :

# Copyright (C) 2017-2018   cc-by-sa 4.0 License : SparkFun
# Version       2018-04-18  cc-by-sa 4.0 http://ModLibre.info
#
# SparkFun Electronics      https://www.sparkfun.com/microbit
# https://learn.sparkfun.com/tutorials/sparkfun-inventors-kit-for-microbit-experiment-guide
# Experiment 1.0 :          Blinking a LED
#
# kiktronik      :          Inventor's Kit for the BBC micro:bit
# https://www.kitronik.co.uk/5603-inventors-kit-for-the-bbc-microbit.html
# Experiment 8   :          Blinking LED (+ compass)
#
# Modified circuit compatible with 4tronix Music:Box
# 3 P0 4 5 6 7 P1 8 9 10 11 12 P2 13 14 15 16 17=3V=18 19 20 21=0V=22
#                              P2                               0V
#                               <-----R1=47 Ohm----+----LED----->
#  R1: Yellow=Jaune=4  Purple=Violet=7  Black=Noir=1  Gold=Or=+-5%
#  https://fr.wikipedia.org/wiki/R%C3%A9sistance_(composant)

from microbit import *

while True:
    pin2.write_digital(1)
    sleep(1000)
    pin2.write_digital(0)
    sleep(1000)
Simulation de la LED :
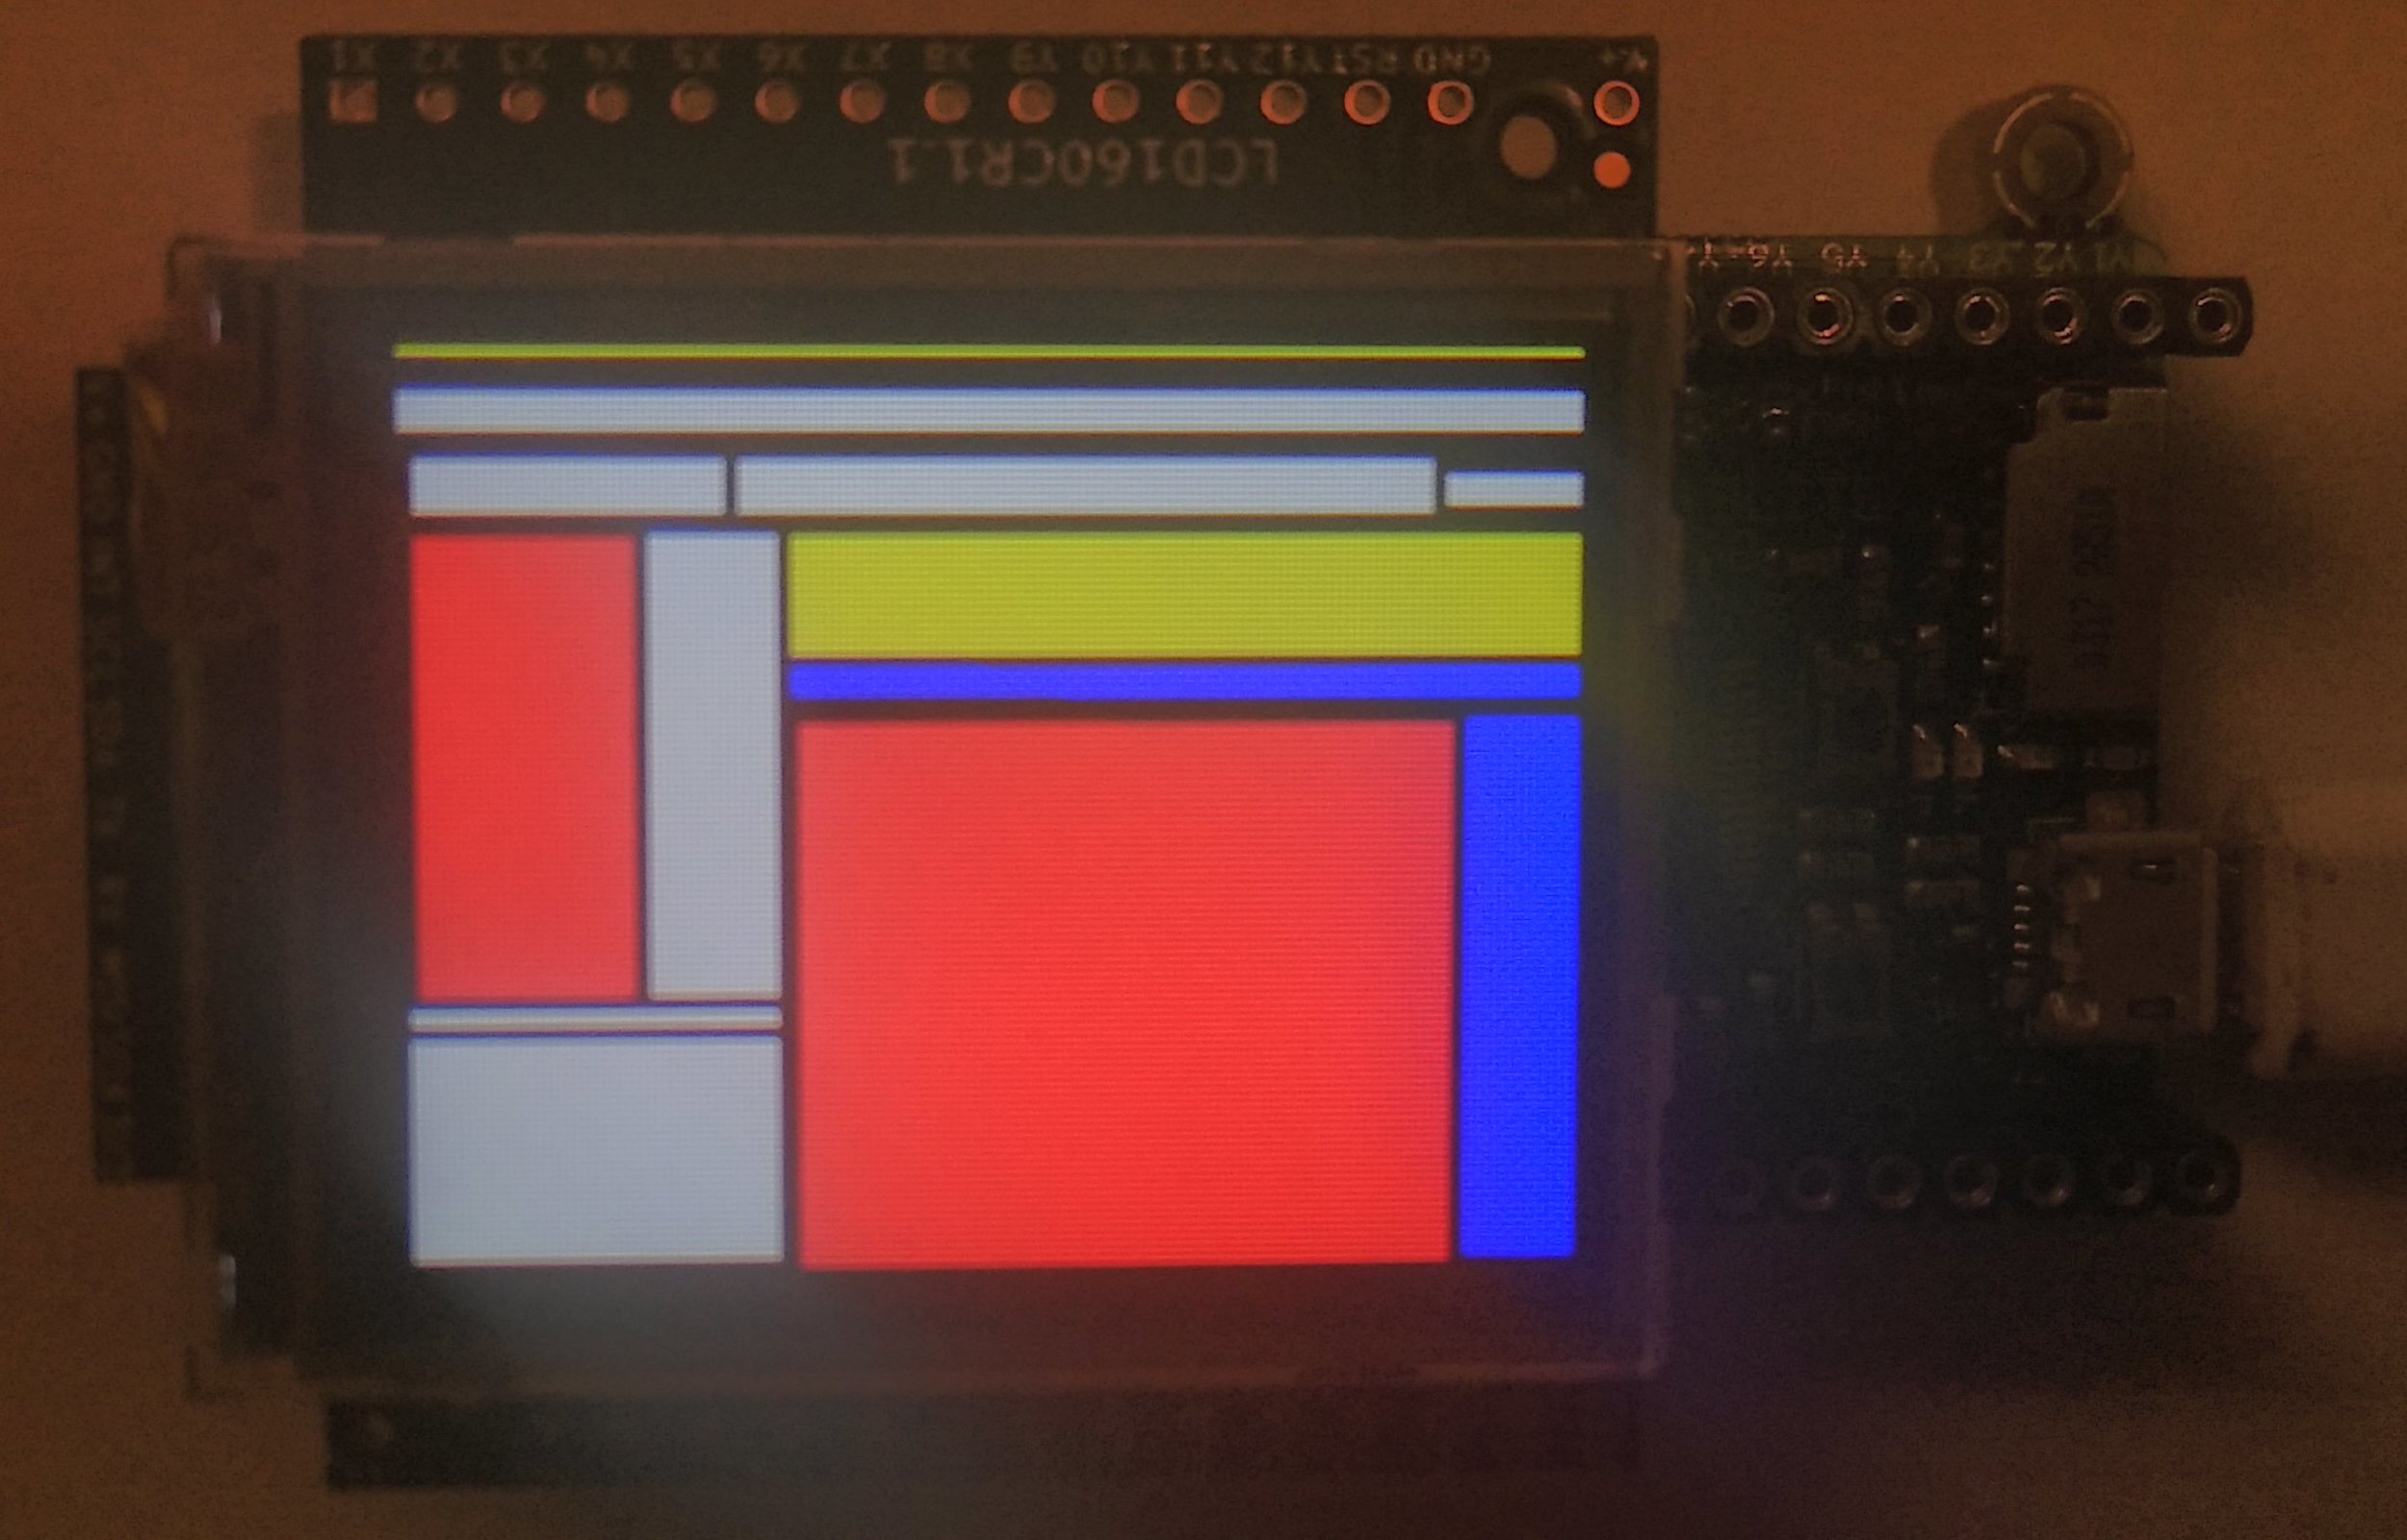
[∇] [Δ] Pyboard : Tableaux inspirés de Mondrian
# main.py -- put your code here!
#:Copyright (C) 2013-2018  MIT License : Nicholas H. TOLLERVEY...
# Ref:                                   MicroPython-Hack-1LED
# http://wiki.mchobby.be/index.php?title=MicroPython-Hack-1LED
# Version       2018-09-07 MIT License : Jean.Thiery@ModLibre.info
#
# NB: Exemple de MicroPython pour le Pyboard

import pyb
from   pyb import Pin
import lcd160cr
from   random import randint, choice, uniform

# Déclaration des broches
# pin_out = Pin('Y9', Pin.OUT_PP)
# pRed   = pyb.Pin( RED_PIN,   pyb.Pin.OUT_PP )
# pGreen = pyb.Pin( GREEN_PIN, pyb.Pin.OUT_PP )
# pBlue  = pyb.Pin( BLUE_PIN,  pyb.Pin.OUT_PP )

pyb.LED(1).on()            # Red
pyb.LED(2).on()            # Green
pyb.LED(3).on()            # Yellow
pyb.LED(4).on()            # Blue

#   while True:
for i in range(4):
    pyb.LED(1).toggle()    # Red
    pyb.delay(500)
    pyb.LED(2).toggle()    # Green
    pyb.delay(500)
    pyb.LED(3).toggle()    # Yellow
    pyb.delay(500)
    pyb.LED(4).toggle()    # Blue
    pyb.delay(500)

#   Attendre 1 secondes
pyb.delay( 1000 )

#   Tout en noir (toutes les LEDs éteintes)
pyb.LED(1).off()           # Red
pyb.LED(2).off()           # Green
pyb.LED(3).off()           # Yellow
pyb.LED(4).off()           # Blue

lcd = lcd160cr.LCD160CR('X')

MAX_DEPTH = 4
RED = lcd.rgb(255, 0, 0)
YELLOW = lcd.rgb(255, 255, 0)
BLUE = lcd.rgb(0, 0, 255)


WHITE = lcd.rgb(255, 255, 255)
BLACK = lcd.rgb(0, 0, 0)
COLOURS = [RED, YELLOW, BLUE, WHITE, WHITE, WHITE]


class Node:
    """
    Un noeud d'arborescence du sujet tableau Mondrian.
    """

    def __init__(self, depth=0):
        """
        Choix de la couleur, calcul de profondeur
        et ajout de noeuds enfants si pas trop dense.
        """
        self.colour = choice(COLOURS)
        self.depth = depth + 1
        self.children = []
        if self.depth <= MAX_DEPTH:
            self.direction = choice(['h', 'v'])
            self.divide = uniform(0.1, 0.9)
            self.children.append(Node(self.depth))
            self.children.append(Node(self.depth))

    def draw(self, x, y, w, h):
        """
        Trace ce noeud et ses enfants x fois.
        """
        lcd.set_pen(BLACK, self.colour)
        lcd.rect(x, y, w, h)
        if self.children:
            if self.direction == 'h':
                self.children[0].draw(x, y, int(w * self.divide), h)
                self.children[1].draw(x + int(w * self.divide), y,
                                      int(w * (1.0 - self.divide)), h)
            else:
                self.children[0].draw(x, y, w, int(h * self.divide))
                self.children[1].draw(x, y + int(h * self.divide), w,
                                      int(h * (1.0 - self.divide)))


while True:
    # Produit un nouveau tableau Mondrian au bout de 4-8 sec.
    tree = Node()
    tree.draw(0, 0, lcd.w, lcd.h)
    pyb.delay(randint(4000, 8000))